Here are a few gift guides I made to help:
Making caramel apples before Halloween is a long standing tradition in our family. There are many ways to make the caramel, an endless variety of goodies to add to the outside, and fun flavors to drizzle on top. It's easy to make fancy looking caramel apples like these.
You can make the caramel from scratch, but it takes awhile. Martha Stewart has a good recipe, if you want to go that route. But truthfully, I'm all for the easiest way to make caramel using melted caramel candies. I prefer to spend my time putting together lots of fun goodies to roll the apples in, and making yummy drizzles for the top. They're fast and easy; and with the right extras added, they look like they came from a gourmet candy store.
Here's my latest batch of caramel apples. There are lots of photos, because I made 10 different flavors--all easy variations on a basic recipe and method.
Step-by-step photos for making caramel apples:
Step 1. Assemble the ingredients.
Here are the simple ingredients you need for making the caramel: either Caramel Bits or wrapped caramel candies. The caramel bits are the easiest, because you don't have to unwrap them like the candies. But, the candies are easy, too. Unwrap each piece, and you're ready to go. The only other ingredient is water. Easy peasy!
view on Amazon: caramel bits

Gather whatever goodies you'd like for covering your caramel apples. I used nuts: chopped almonds, pecans, walnuts, and peanuts. Candies: chopped Snickers, mini M&Ms (the big ones fall off), sprinkles, toffee bits, and mini marshmallows (cut those in half). I also used crushed Oreos. These all need to be chopped fairly small. It is hard to keep bigger pieces from sliding down or falling off the caramel.

There are lots of varieties of baking chips that can be easily melted and drizzled on your caramel apples. Shown below are some of the baking chip varieties: semi-sweet, milk, white, and special dark chocolate; cinnamon, peanut butter, & butterscotch. I melted the semi-sweet chocolate, white chocolate, and cinnamon chips to drizzle on the apples I'm about to show you.

Step 2. Prepare the apples.
You need firm, crisp apples. If possible, buy apples that aren't waxed. The wax will keep the caramel from sticking. If yours are waxed, wash them with baking soda or give them a quick dunk in boiling water to melt the wax off. Dry them thoroughly and remove the stems. Insert a stick into the stem end--about 3/4 of an inch so that they are in there firmly. You can pierce the apple with a knife first to make the sticks go in more easily. Refrigerate the apples. This will make the caramel harden faster.

Step 3.
CHOOSE FROM 2 EASY METHODS FOR MELTING THE CARAMEL:
Method 1 -- Melt caramel in the microwave.
I used the caramel bits, and am making a double batch so that I have enough to dip 10-12 apples. Add water to the caramel bits (or candies if you're using them). 2 tablespoons of water per bag of caramel bits or candies. Zap it in the microwave for approx. 3 minutes. Stir after each minute, and stop heating it as soon as it's all melted.

Dip the apples in caramel.
You can spoon some of the caramel on, too. Lift the apple out of the caramel and let the excess drip off. I scrape the bottom with a spoon, too. The caramel will continue to drip down, and will pool on the pan some as it hardens. So, scrape some off of the bottom now to keep too much caramel from building up at the bottom.

Method 2 -- Melt the caramel in a slow cooker. (It takes longer to melt, but the caramel can be kept warm for an extended period of time.) Create a double boiler in the slow cooker by inserting a heat tolerant bowl that is surrounded by hot water. The caramel melts gently on the high setting and can be kept melted on the warm setting for 1-2 hours. This is very convenient if you'll be dipping a lot of apples or want to do this for a party activity.
view on Amazon:
- my favorite slow cooker (#1 recommendation of Cooks Illustrated),
- heat tolerant glass bowl set (both the middle and large size in this set fit inside my slow cooker)

Step 4. Roll the apples in toppings.
Roll the apples in chopped nuts, candies, or cookies. Use your hand to press the goodies in and help them stay in place. (Sorry, but I can't show you this and still have a hand left for shooting my camera.) Place the apples on waxed paper or aluminum foil that's been greased or coated with cooking spray. As some of the caramel drifts down and pools on the bottom, it will take these toppings with it. So, you may need to go back and gently pull the toppings back up and pat them back into the caramel. I ended up doing this a few times. Eventually the caramel hardens enough that everything stays put.

Here are my apples after I have dipped them and coated them with a variety of goodies. They are good enough to chill and eat like this. But I like to fancy mine up a bit, and make them tastier to boot. Before adding melted chocolate, chill the apples for 15-30 minutes.

Step 5. Melt chocolate chips (or other flavored chips).
Now it's time to melt some chocolate. I love this part! (That would be because chocolate is involved.) If you don't know how, here's my easy microwave recipe:
View Melting Chocolate for Dipping and Drizzling Recipe
If you'll be melting a variety of chocolate and flavored chips, a slow cooker is a great way to melt several kinds at once and keep them melted for awhile while you're working with them. Check out my post for instructions:
You can drizzle on your melted chocolate with a spoon. But, here's a way that makes this so much easier. Use a funnel to pour your melted chocolate into a plastic squeeze bottle. Set your bottle in a jar or bowl of hot water to keep the chocolate nice and melted. I made up a bottle of melted white chocolate, too, while I was at it. (These can also be inserted in hot water in a slow cooker to keep them warm and melted.)
view on Amazon: stainless steel funnel, plastic squeeze bottle

Step 6. Drizzle the apples with melted chocolate or other flavors.
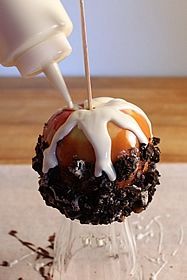
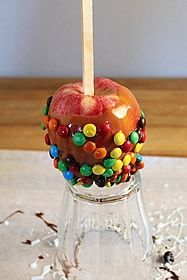
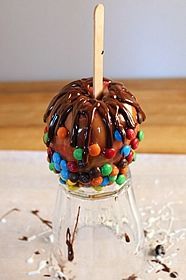
I set my apple on an inverted glass to make this part easier. Start squeezing the melted chocolate from the center top of the apple, and weave the bottle in and out to get a gap between drizzles--it's prettier that way.
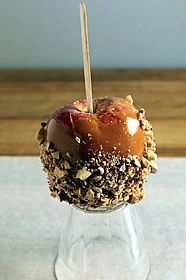
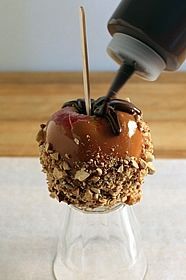
You can make the drizzles short, or squeeze the chocolate in longer drizzles, or mix it up. Since the apples have been chilled first, the chocolate hardens quickly. Look how much prettier this apple looks--and you know it's going to taste better, too.
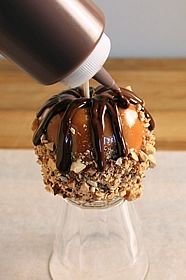

If you hold the bottle of melted chocolate higher above the apple, the chocolate comes down in a thinner stream and you can squiggle it around on the apple to get a lacy drizzle. I used dark chocolate first, and then added white chocolate. Pick the apple up and move it at different angles as you drizzle so that you can get the lacy appearance. (Again, I can't demonstrate this and shoot photos at the same time.)


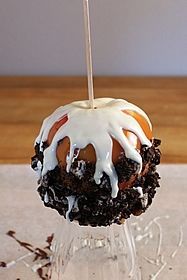
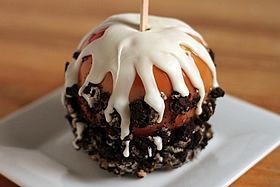
On this apple with crushed Oreos, I added just a white chocolate drizzle from the top. So pretty!
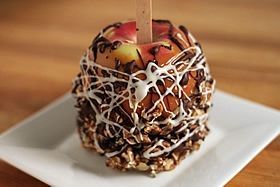
Here I added both dark and white chocolate drizzles--one drizzling from the top and letting it drip down, and one with the lacy drizzle.
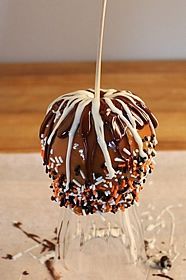
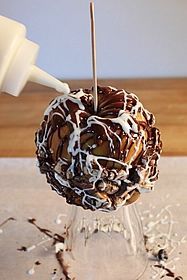
My M&M covered apple was kind of frustrating. The weight of the M&Ms made them slide down--even though I used the mini M&Ms. It sure didn't look very attractive. UNTIL I added a chocolate drizzle at the top. That totally masked how all of the M&Ms had gone south on me. Now it looks great (almost like I planned it that way)!
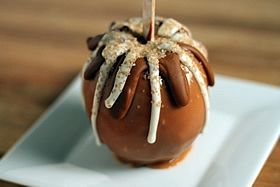
This one is so pretty. It's an "Apple Pie" caramel apple. I melted cinnamon baking chips and drizzled them on. Then I drizzled on white chocolate. Then I sprinkled it with a combination of course raw sugar mixed with pumpkin pie spice (or you could use brown sugar and cinnamon). View Pumpkin Pie Spice Mix Recipe. Mix 3 tablespoons of sugar to 1/2 teaspoon of pumpkin pie spice or cinnamon.

Drum roll, please! Presenting my finished caramel apples:
1. Oreo with white chocolate drizzles.
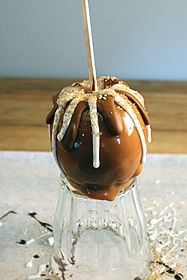
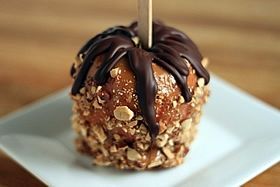
2. Toasted almonds with dark chocolate drizzles.
3. Apple Pie with cinnamon and white chocolate drizzles, and spiced sugar sprinkles.
4. Turtle - pecans with dark and white chocolate drizzles.
5. M&Ms with dark chocolate drizzles.
6. Snickers with light and dark chocolate drizzles.

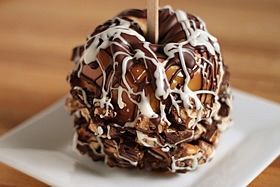
7. Rocky Road - mini marshmallows (cut in half) and walnuts with dark chocolate drizzles.
8. Peanuts with dark chocolate drizzles.
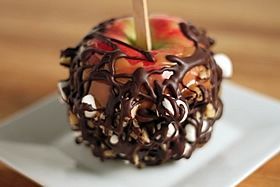
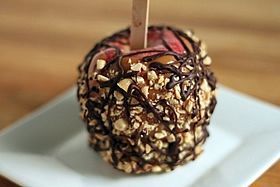
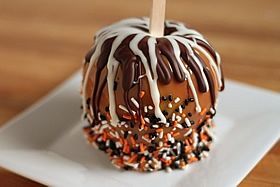
9. Halloween sprinkles with dark and white chocolate drizzles.
10. Toffee bits with dark chocolate drizzles.
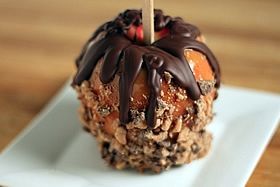
How to store your caramel apples.
Store your finished apples uncovered in the fridge. Or, you can wrap each of them individually in cellophane bags. My bags are 5x11--they come in lots of sizes--look for them at party and craft stores. I set each apple in a muffin top paper cup before putting it in the bag--that makes it easier to get them in and out of the bag without sticking. You can also cut wax paper circles and set the apples on those inside the bag. If you bag them up, don't store them in the fridge; if you do, when you remove them from the fridge they will sweat inside the bag and get icky. The apples will keep several days in bags at room temperature.
Storage update 6 days later: I sliced and ate one of these caramel apples that had been bagged and stored at room temperature for 6 days. It was still fresh and delicious. As long as you are using fresh, in-season apples, it looks like you can count on caramel apples being good for at least a week. What a great make-ahead treat!
view on Amazon: cellophane bags, muffin top paper cups

Turn these into gifts.
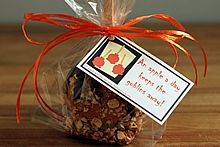
These make great gifts, party favors, or classroom treats. For tips on turning caramel apples into fun gifts--including downloadable gift tags--check out this post:
How to Make Caramel Apple Gift Bags & Tags
Slicing and serving tips.
It can be tricky to eat, slice, and serve caramel apples. I've got an easy solution in my post:
How to Cut and Serve Perfect Caramel Apple Slices

I've been trying to decide which one is my favorite. I think the Apple Pie (below) is the most elegant looking one.

But, the Snickers caramel apple (below), is the one that I think tastes the best. No, wait. Rocky Road--that's the one. Oh, but I like the Turtle one, too. I can't choose. They're all so good.

What do you think? Do you have a favorite caramel apple flavor?

I guess you just need to try them all. (I intend to.)
Make it a yummy day!
Monica
Other seasonal posts that may interest you:
- Comparing Apples to Apples--Which Are Best for Eating and Cooking
- Maple Pumpkin Spice Lattes--A Big Batch Party Recipe
- Spiced Hot Drink Mix--for cider, cocoa, coffee, tea, juice, or wine
- How to Prevent Apple and Pear Slices from Browning
- Three Easy Dips--Pumpkin Pie, Caramel, and Peanut Butter.
- 1 (14 oz.) pkg. caramel candies, unwrapped; OR, 1 (11 oz.) pkg. caramel bits
- 2 tablespoons water
- 5 to 6 medium apples
- 5 to 6 popsicle or craft sticks
- chopped nuts, cookies, or candies (if desired)
- melted chocolate for drizzling (if desired--see the recipe for melting baking chips for drizzling online at www.TheYummyLife.com/recipes/26)
* To use the SLOW COOKER METHOD for melting the caramels: Select a heat tolerant bowl that will fit inside your slow cooker. Insert bowl into slow cooker; add caramel candies or bits and 2 tablespoons of water. Add hot tap water to the slow cooker filling the area outside of the glass bowl until the water level is even with the caramels in the bowl. Cover slow cooker and cook on high for approx. 2 hours, or until caramels are completely melted when stirred. To maintain melted consistency for 1-2 hours, lower slower cooker heat to warm setting. If caramel thickens as it sits, you may stir in more water as needed, 1 tablespoon at a time.
This post was updated October 2013.
Here are a few gift guides I made to help:


 Print recipe
 Pin recipe on Pinterest


